How to Add Headings in Word (Apply Styles, Check Structure and Fix Problems)
Add headings in Word with built-in heading styles, customize them once, check the structure in the Navigation pane and fix common problems, using a consulting proposal as the example.
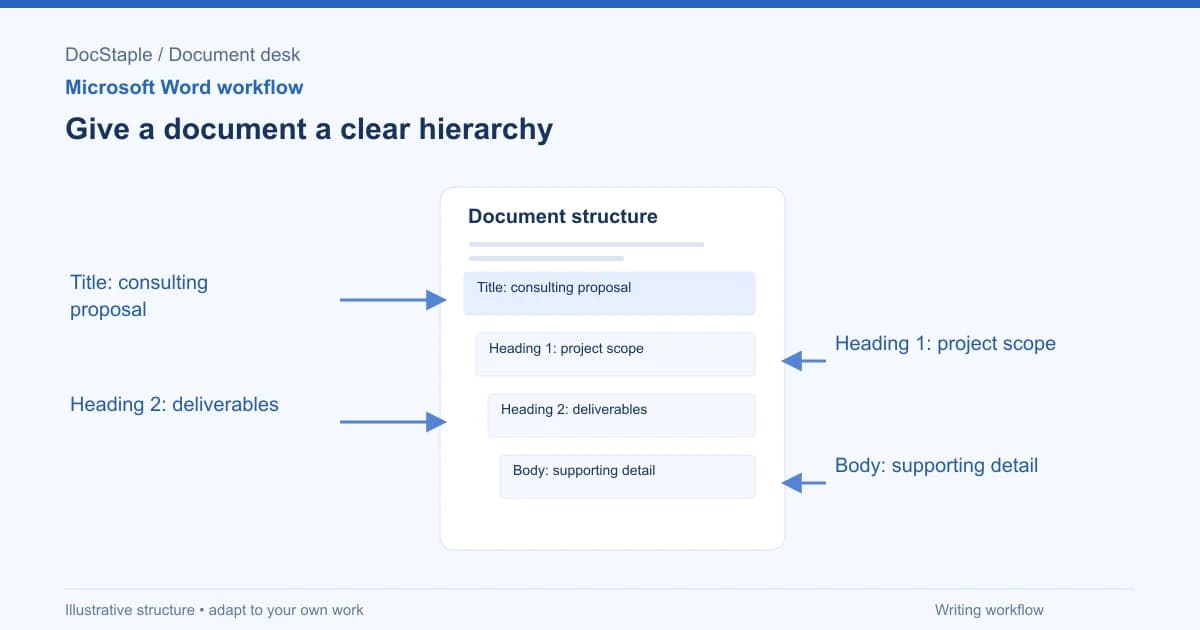
You open a consulting proposal that three people have edited. Some section titles are bold, some are bigger, and one is bold, bigger and underlined. Visually it nearly works. But the document has no real outline, the Navigation pane is empty, and a table of contents would have nothing to collect.
Real headings fix this. This guide shows how to add them with Word's heading styles, how to change their appearance once for the whole document, and how to check the result before the file goes to a client. The worked example is a proposal for a six-week operations review.
Which Word versions this covers
Microsoft's Add a heading in a Word document page applies to Word for Microsoft 365, Word for Microsoft 365 for Mac, Word 2024, Word 2024 for Mac, Word 2021, Word 2021 for Mac, Word 2019 and Word 2016. The steps below follow that page for Windows and Mac.
Menu labels can differ slightly between editions. I have not tested Word for the web or mobile apps for this guide, so check Microsoft's page for your edition if a command is not where I describe it.
Add a heading with a heading style
The simplest method is a heading style. Microsoft's steps for Windows are:
- Select the text you want to use as a heading.
- On the Home tab, hover over the headings in the Styles gallery to preview how your text will look.
- Select the heading style you want.
- If you do not see the style you need, select the More button to expand the gallery.
On Mac, Microsoft says to select the text, go to the Home tab, choose your preferred heading style, and use the arrow buttons to see more styles.
To type a new heading rather than convert existing text, put the cursor on an empty line, choose the style, and then type. Check the style of the next paragraph before you keep writing, so body text does not end up in a heading style.
The scenario: an operations-review proposal
Imagine a small consultancy preparing a proposal for a client's operations review. The engagement lead has pasted in text from an earlier proposal, and the formatting is a mix. Here is a workable outline for the finished document:
- Heading 1: Proposal for an operations review (the document title line, used once)
- Heading 2: Client need and proposed outcome
- Heading 2: Scope and deliverables
- Heading 3: Included work
- Heading 3: Exclusions
- Heading 2: Delivery approach and timetable
- Heading 2: Fees and acceptance
- Heading 2: Approval and next actions
Apply Heading 2 to each main section title and Heading 3 to the sub-parts. Select each line and pick the style rather than reformatting by eye. If your organization has its own convention, such as using Heading 1 for every main section, keep it consistent across all documents.
Write headings that say something
Heading text matters as much as the style. Microsoft's accessibility guidance for Word recommends using the built-in heading styles and creating descriptive heading text to make it easier for screen reader users to determine the structure of the document. It also says each heading should ideally cover only a few paragraphs.
In a proposal, that points to headings like these:
Scope and deliverables: what is included Exclusions: what this proposal does not cover Fees and acceptance: how the work is priced and approved
A heading such as "Details" or "Other" tells a reviewer nothing when they jump to it from the outline. A short, plain label lets the client find the fee section without reading everything above it.
Keep the levels in order
Microsoft's accessibility page says to organize headings in the prescribed logical order and not skip heading levels. Its example is to use Heading 1, Heading 2 and then Heading 3, rather than Heading 3, Heading 1 and then Heading 2.
The tempting mistake is to pick Heading 3 for a section because its default size looks better. Resist that. Choose the level for the structure and fix the appearance in the style, which the next section covers.
Change how the headings look, once
Suppose the client's brand guide asks for a dark blue Heading 2. Do not recolor each one. Microsoft's steps are:
- Select one heading that uses the style and format it the way you want.
- On the Home tab, in the Styles group, right-click the heading style you customized.
- Select Update Heading to Match Selection.
Microsoft says that future applications of that style will include your customizations. Afterward, scroll the whole document. Any heading you formatted by hand before applying the style may keep its manual formatting, and it is easy to miss.
If the proposal starts from a shared layout, make this change in the working copy before you start writing, so the styles are settled before the content grows.
Check the outline in the Navigation pane
Once headings are in place, look at the outline. Microsoft's Navigation pane page says you can open it by pressing Ctrl+F or by selecting the View tab and then Navigation Pane. That page describes the Windows behavior and notes that the pane behaves differently in Word for Mac and on the web.
On the Headings tab you can click a heading to jump to it, and you can show or hide subheadings. Microsoft also says you can drag a heading to move that section, or right-click a heading to change its level or add a heading. For the proposal, this is a fast way to move "Exclusions" ahead of "Delivery approach and timetable" without cutting and pasting.
Use the outline as a review tool. Read only the headings from top to bottom. If the sequence does not tell the story of the proposal, the structure needs work before the wording does.
Microsoft states that the Navigation pane does not display headings in tables, text boxes, or headers or footers. If a section title is missing from the outline, check whether it sits inside a table or a text box.
Common formatting problems
A heading looks right but is missing from the outline. It is probably formatted by hand. Select it and apply the heading style.
The wrong headings changed after a style update. You may have updated a different style from the one you meant. Undo, select a clean heading of the right level and repeat the update step.
The outline has gaps or odd nesting. A level was skipped or a heading was chosen for its look. Reassign the levels in logical order and adjust the styles instead.
You cannot drag sections in the Navigation pane. Microsoft notes that if the document has protected regions, you may not be able to drag sections beyond the last protected area. Do not try to bypass protection someone set deliberately; ask the document owner.
Text pasted from another file brings its own formatting. Reapply the correct heading style to each pasted heading, then check the Navigation pane.
Review criteria and final saved-document check
Before the proposal goes out, use these criteria:
- Every section title uses a heading style. No bold-only lines standing in for headings.
- Levels are in order. No jump from Heading 1 straight to Heading 3.
- Headings are descriptive. A reader can tell what each section covers from the title alone.
- Appearance comes from the styles. No heading has stray manual formatting.
- Reviewers can navigate. The outline reads as a sensible summary of the proposal.
Then run a final saved-file check:
- Save the finished version under a new name, such as "Ops-review-proposal-v3-client-ready.docx."
- Close the file and reopen it from disk.
- Open the Navigation pane and confirm every expected heading appears in the right order and nesting.
- Scroll through the pages and confirm the heading styles look consistent.
- Read the section titles once more, especially the ones covering scope, exclusions, fees and acceptance.
Consistent headings are easier to keep when every proposal starts from the same layout. The consulting proposal template is an editable Word file with a fixed section order, so your team can adjust heading styles once and reuse them.
Last updated: September 26, 2026
Frequently Asked Questions
Related Articles
How to Add a Signature in Word (Line, Image or Digital)
Learn three ways to add a signature in Microsoft Word: a plain signature line, a scanned handwritten image, and a Microsoft Office signature line, with a consulting proposal example.
How to Add Page Numbers in Word (Step by Step)
Learn the exact menu steps for adding page numbers in Microsoft Word, skipping the cover page, restarting numbering, and fixing common problems in a business proposal.
How to Compare Two Word Documents (Compare, Combine and Side by Side)
Compare two versions of a Word document with Review > Compare, know when to use Combine instead, and run a final check on the result, using a consulting proposal that came back from the client with edits.
How to Create a Template in Word (Save, Reuse and Edit a .dotx File)
Build a reusable Word template from a finished document, save it as a .dotx file, find it again under New, and check it before anyone uses it, using a consulting proposal as the worked example.
How to Create Fillable Forms in Word (Content Controls Step by Step)
Build a fillable form in Microsoft Word with content controls: show the Developer tab, add text, drop-down, date and check box fields, protect the form and test it, using a consulting proposal intake form as the example.
How to Insert a Table of Contents in Word (Step by Step)
Learn the exact menu steps for inserting an automatic table of contents in Microsoft Word, why headings matter, and how to fix common formatting problems.