How to Create a Template in Word (Save, Reuse and Edit a .dotx File)
Build a reusable Word template from a finished document, save it as a .dotx file, find it again under New, and check it before anyone uses it, using a consulting proposal as the worked example.
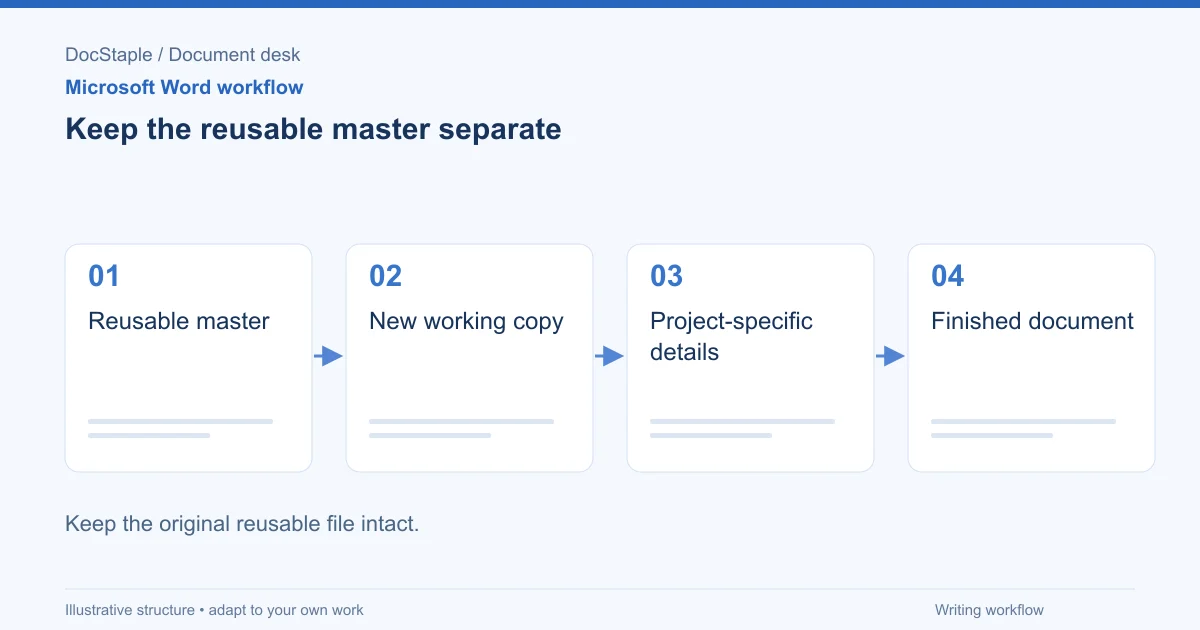
A proposal that took a week to get right gets rewritten from scratch the next time, because the good version is buried in an email thread and the client's name is still in the footer. A Word template solves this by giving you one clean starting point that opens as a fresh document each time.
This guide shows how to create a template in Word, what to put in it, and how to check it before anyone else uses it. The worked example is a consulting proposal, but the same steps apply to a procedure, a report or a letter.
Which Word versions this covers
Microsoft's Create a template page lists Word for Microsoft 365, Word 2024, Word 2021, Word 2019 and Word 2016, with separate steps for Windows and Mac. The page does not mention Word for the web, so I have not verified template creation there. Use desktop Word for everything below.
Menu names and dialog layouts can differ slightly between versions. Treat the sequences here as a guide and confirm against Microsoft's page for your edition.
The scenario: a consultancy that keeps rebuilding its proposal
Imagine a two-person consultancy that sells a six-week operations review. Every proposal follows the same shape: the client's problem, the scope, the approach, the fees and the acceptance terms. Each one starts by copying the last file and deleting what no longer applies. Twice, an old client's name has survived into a new document.
The fix is a template with the structure, the styles and the standard wording already in place, and with obvious placeholders where the facts change. The consultancy builds it once from its best recent proposal.
Step 1: Prepare the document before you save it
Do the work in the document first. Saving comes last, and a template is only as good as what is in it.
- Start from your strongest finished proposal and save a normal
.docxcopy under a new name. Never strip down the only copy of a live proposal. - Delete everything specific to one client: names, dates, prices, quotes, project details, and anything in headers, footers, comments and the file's properties.
- Keep everything that is the same every time: section order, headings, fixed wording, table layouts, page setup and the footer.
- Replace variable content with placeholders that are impossible to miss, such as
[Client name]or[Fee and payment schedule].
Placeholders work best when they say what to enter, not just that something is missing. Compare [TBC] with [Total fee in USD, excluding taxes]. The second one tells the next person exactly what belongs there.
Step 2: Set up styles so the formatting travels with the file
Styles are what make a template reliable. If headings are formatted by hand, each user will format them slightly differently. If they use styles, the look stays consistent and can be changed in one place.
Microsoft's page on customizing or creating new styles describes two routes. To modify a style, go to the Home tab, right-click a style in the Styles gallery and choose Modify, then change the font, size, colour, alignment, spacing or indentation in the Formatting section. To create a new one, right-click formatted text, choose Styles in the mini toolbar, then Create a Style, and name it.
For the consulting proposal, a small set is enough:
- Heading 1 for the six main sections.
- Heading 2 for sub-sections such as individual deliverables.
- Normal body text set to the firm's font and spacing.
- A style for the placeholder text, so unfilled fields stand out and can be found before sending.
Microsoft's page also describes the option New documents based on this template at the bottom of the Modify dialog, which makes a style available in future documents based on the template you are working in. Check that it is selected when you save your style changes.
Step 3: Write the fixed wording and the prompts
This is the part that saves the most time. Fixed wording should be text you are willing to send to every client. Prompts should tell the author what to add.
Here is how the opening and fee sections of the consulting proposal might read in the template:
Our understanding of your needs [Client name] has asked us to review [area of operations] because [reason in the client's own words]. We understand the outcome you want is [measurable objective].
Fees and payment Our fee for this work is [amount and currency], payable [schedule]. The fee excludes [taxes and expenses, or "none"]. Work outside the scope described in section 2 will be quoted separately and agreed in writing before it begins.
Two habits keep this wording safe. First, keep commitments neutral until someone has approved them: the template should not promise an outcome the consultancy does not control. Second, do not treat the standard terms as legal advice. If your proposal includes contractual terms, have a qualified adviser review the fixed wording once, and again when the law or your business changes.
Add a short acceptance block at the end with fields for the client's name, role and date, and a line describing how acceptance is recorded. Leave the actual approval to the people involved. The template can only make the request clear.
Step 4: Save the file as a template
The save steps differ by platform. These follow Microsoft's Create a template page.
On Windows:
- Select File > Save As.
- Double-click This PC.
- Enter a name in the File name box, such as "Consulting proposal template".
- In the Save as type list, choose Word Template. Choose Word Macro-Enabled Template only if the document contains macros.
- Select Save.
Microsoft says Office saves to the Custom Office Templates folder by default. Leave it there unless you have a reason to move it.
On Mac:
- Open the document and select File > Save as Template.
- Enter a name in the Save As box.
- Optionally, choose a different location in the Where box.
- Next to File Format, choose Microsoft Word template (.dotx), or Microsoft Word Macro-Enabled template (.dotm) if there are macros.
- Select Save.
Microsoft gives the default Mac location as the Templates folder under /Users/username/Library/Group Containers/UBF8T346G9.Office/User Content.
The file formats matter. Microsoft describes .dotx as the standard template format and .dotm as the macro-enabled one. A proposal needs no macros, so .dotx is the right choice.
Step 5: Start a new proposal from the template and edit it later
To create a document from the template, Microsoft says to go to File > New and choose Personal (or Custom, depending on your version), then select the template. The consultancy then saves the new document under the client's name straight away, so the template itself is never overwritten.
To change the template later, Microsoft's Edit templates page gives these Windows steps: File > Open, double-click This PC, go to the Custom Office Templates folder in My Documents, select the template, choose Open, make the changes, then save and close. Open it from there rather than starting a new document from it, or you will be editing a copy instead of the template.
Microsoft's page does not say what happens to documents you created earlier. Assume they do not change, and update live proposals by hand if a template fix matters to them.
Common problems and how to avoid them
The template does not appear under Personal. It was probably saved as a .docx or in a different folder. Save it again as a template type, in the default folder, and check whether your version labels the tab Personal or Custom.
Old client details show up in new documents. Check headers, footers, comments, text boxes and the document properties. These are the places people forget. Search for the previous client's name before saving.
Formatting drifts between authors. People are using direct formatting instead of styles. Remind users to apply Heading 1 and Heading 2 rather than bolding text.
You cannot save to the folder. On a managed work computer, the location may be restricted. Ask whoever manages the device or shared drive, and do not try to get around the restriction.
Two versions of the template exist. Keep one master in a known place, put a version and date in the file name or on the first page, and remove old copies from personal folders when you replace them.
Review criteria and final saved-file check
Before anyone uses the template for a real client, review it against these criteria:
- Structure. Sections appear in the order you want, with headings applied through styles.
- Placeholders. Every variable field is marked clearly and says what to enter.
- Clean of history. No client names, prices, comments or tracked changes from earlier documents remain.
- Fixed wording. Standard text has been read by the person who owns commercial terms, and by a qualified adviser where legal terms are included.
- Format. The file is saved as
.dotx, unless you deliberately need macros.
Then run this check on the saved file:
- Close the template, then open File > New > Personal and confirm it is listed.
- Create a new document from it and confirm the styles, footer and page setup are all present.
- Fill in a dummy client's details, then search for any brackets that remain to be sure all placeholders can be found.
- Save the test document under a different name and confirm the original template is unchanged.
- Delete the test document and record the template's version and date in your document log.
If you would rather start from a finished structure than build your own, the consulting proposal template is an editable Word file with the sections laid out and prompts for the content. Either way, the template only saves time if it is kept current, so schedule a short review after every few uses.
Sources: Create a template, Microsoft Support, Edit templates, Microsoft Support, Customize or create new styles, Microsoft Support
Last updated: September 26, 2026
Frequently Asked Questions
Related Articles
How to Add a Signature in Word (Line, Image or Digital)
Learn three ways to add a signature in Microsoft Word: a plain signature line, a scanned handwritten image, and a Microsoft Office signature line, with a consulting proposal example.
How to Add Headings in Word (Apply Styles, Check Structure and Fix Problems)
Add headings in Word with built-in heading styles, customize them once, check the structure in the Navigation pane and fix common problems, using a consulting proposal as the example.
How to Add Page Numbers in Word (Step by Step)
Learn the exact menu steps for adding page numbers in Microsoft Word, skipping the cover page, restarting numbering, and fixing common problems in a business proposal.
How to Compare Two Word Documents (Compare, Combine and Side by Side)
Compare two versions of a Word document with Review > Compare, know when to use Combine instead, and run a final check on the result, using a consulting proposal that came back from the client with edits.
How to Create Fillable Forms in Word (Content Controls Step by Step)
Build a fillable form in Microsoft Word with content controls: show the Developer tab, add text, drop-down, date and check box fields, protect the form and test it, using a consulting proposal intake form as the example.
How to Insert a Table of Contents in Word (Step by Step)
Learn the exact menu steps for inserting an automatic table of contents in Microsoft Word, why headings matter, and how to fix common formatting problems.